10 Flutter Tips – to be more productive
There are lots of small tricks to make your long-term productivity with flutter much better. Here are some tips and tricks that i learned from my past 2 years of my flutter journey,
1. Responsive
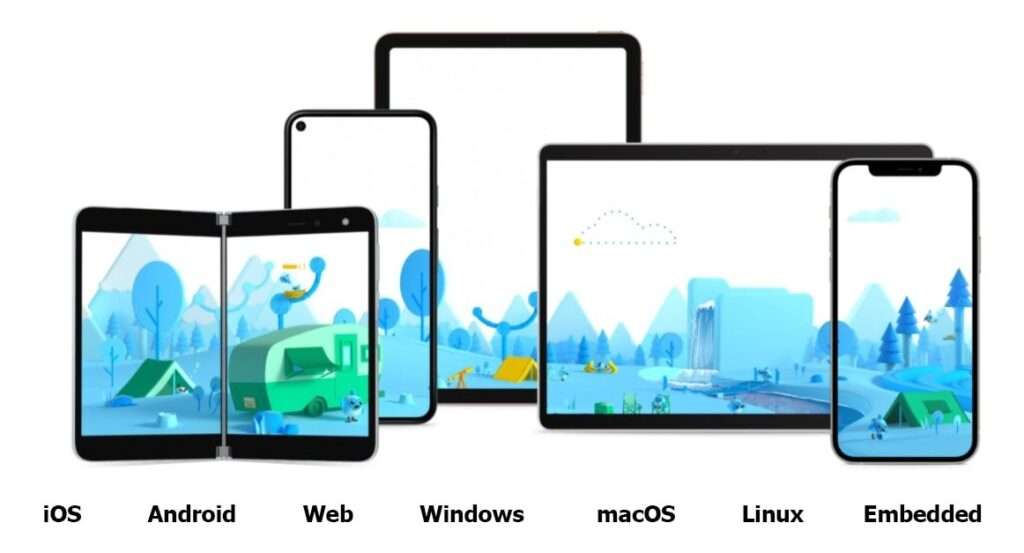
The biggest advantage of Flutter is being able to develop applications for all platforms from a single code base. Even though the app you create can be run on all compatible devices, we are faced with the challenge to maintain an optimal UI on a large variety of screen sizes.
Use Layout Builder or Media Query, a responsive framework package to make your app responsive to all screen sizes. Try to make it responsive while starting the development of the app.
Using Layout Builder
Wrap the body of the app with Layout Builder, give the height and width according to the percentage of maximum width and height of the container. Then it maintains an optimal UI on all screen sizes.
LayoutBuilder(
  builder:(BuildContext context,BoxConstraints constraint){
    return Column (
      children: [
        Container (
          color: const Color(0xffa0dff2),
          height: constraint.maxHeight * 0.35,
          width: constraint.maxWidth,
        ),
        Container (
          margin: const EdgeInsets.only(top: 8.0),
          color: const Color(0xffdaeff5),
          height: (constraint.maxHeight * 0.65)-8,
          width: constraint.maxWidth
        ),
      ],
    );
  }
),
Using Media Query:
Media Query, gives us the height and width of the screen. Use height and width of the elements as the percentage of the total screen’s height and width. Then it maintains an optimal UI on all screen sizes.
Padding (
  padding: const EdgeInsets.all(8.0),
  child: Column (
    children: [
      Container (
        color: const Color(0xffa0dff2),
        height: MediaQuery.of(context).size.height * 0.35,
        width: MediaQuery.of(context).size.width,
      ),
      Container (
        margin: const EdgeInsets.only(top: 8.0),
        color: const Color(0xffdaeff5),
        height: MediaQuery.of(context).size.height * 0.65- 8,
        width: MediaQuery.of(context).size.width,
      ),
    ],
  ),
),
2.Splash Screen
Splash Screen also called launch screen, it is basically the first screen which is shown only a few seconds before launching an application and is used to enhance app’s initial experience. By default, flutter displays a white screen as loading screen.
Here we see how to implement splash screen in flutter,
We can easily implement a splash screen in flutter by the flutter_native_splash package.
1.The first and foremost step is to get the package, for that add the package in pubspec.yaml file
dependencies:
  flutter_native_splash: ^2.2.6
Then run flutter pub get and then we need to add image file to our images folder in our project
2. Also add these lines too in your pubspec.yaml file.
dependencies:
  flutter_native_splash: ^2.2.6
flutter_native_splash:
  color: "#223263"
  image: "images/image.png"
  android: true
  ios: true
  #background_image: "images/image.png"
  #image_ios: "images/image.png"
  #image_android: "images/image.png"
Color: Used to give background color to the splash screen.
background_image: Used to set background image to the splash screen. you should use one among these parameters(color, background_image) to set the splash screen
Set android and iOS to true, this tells the package to generate icons in splash screen for both android and iOS platform. If you don’t want to generate icon in splash screen for a platform, you can set it to false. We can also make this more specific, for example by adding image_ios and image_android will allow us to add a different icon for each platform. That means this will generate a specific icon for both Android and iOS.
3. Now you can use it by importing the package in your Dart code,
import 'package:flutter_native_splash/flutter_native_splash.dart';
Now run our splash screen using the following commands:
flutter pub run flutter_native_splash:create
You can read more about these attributes and available configurations on the readme tab of the package.
3.Adding app icons
We can add app icons to flutter using two approaches manually or there is some way to automatically generate the different icon sizes and place them in the correct platform folders. We can do that using the flutter_launcher_icons package. It’s a very popular package with a lot of likes. I personally use it to generate the icons in all my flutter projects.To install this package in our projects we will first add the flutter_launcher_icons in pubspec.yaml file. To do this, copy these lines and paste it under the dependencies in pubspec.yaml file. And let’s click the get packages icon or run “flutter pub get” in the terminal to get the latest package.
dependencies:
  flutter_launcher_icons: ^0.9.2
Now that we installed the flutter launcher icons package, we need to add the app icon file to our images folder in our project. Then we need to start configuring the newly installed package for that, add these code under the dependencies.
dependencies:
  flutter_launcher_icons: ^0.9.2
flutter_icons:
  image_path: "images/image.png"
  android: true
  ios: true
  #image_path_ios: "images/image.png"
  #image_path_android: "images/image.png"
These are some configuration properties of flutter icons.
image_path: here we add our image path, we have stored it in under images folder.
Set android and ios to true, this tells the package to generate the icons and replace the existing ones for both android and ios. If you don’t want to generate icons for a platform, you can set it to false. We can also make this more specific, for example by adding image_path_ios and image_path_android will allow us to add a different icon for each platform. That means this will generate a specific icon for both Android and iOS.
After setting up the configuration, you only left to do is run these two lines in your terminal
flutter pub get
flutter pub run flutter_launcher_icons:main
You can read more about these attributes and available configurations on the readme tab of the package.
4.URL Launcher
URL Launcher is one of the most popular and widely used packages in flutter, it allows you to easily launch a url, a phone call, send an SMS or any mail.To install this package in our projects we will first add the url_launcher in pubspec.yaml file. To do this, copy these lines and paste it under the dependencies in pubspec.yaml file. And let’s click the get packages icon or run “flutter pub get” in terminal to get the latest package.
dependencies:
  url_launcher: ^6.1.5
Now it’s important to add the following configurations in order to support the latest version of android and ios for that we will open the Android mainfest.xml file and paste this code as a child of the root element<queries>
<queries>
  <!-- If your app opens https URLs -->
  <intent>
    <action android:name="android.intent.action.VIEW" />
    <data android:scheme="https" />
  </intent>
  <!-- If your app makes calls -->
  <intent>
    <action android:name="android.intent.action.DIAL" />
    <data android:scheme="tel" />
  </intent>
  <!-- If your sends SMS messages -->
  <intent>
    <action android:name="android.intent.action.SENDTO" />
    <data android:scheme="smsto" />
  </intent>
  <!-- If your app sends emails -->
  <intent>
    <action android:name="android.intent.action.SEND" />
    <data android:mimeType="*/*" />
  </intent>
</queries>
Under the package name, we will also add these lines for internet permission
<manifest xmlns:android="http://schemas.android.com/apk/res/android"
    package="com.example.example">
    <uses-permission android:name="android.permission.INTERNET"/>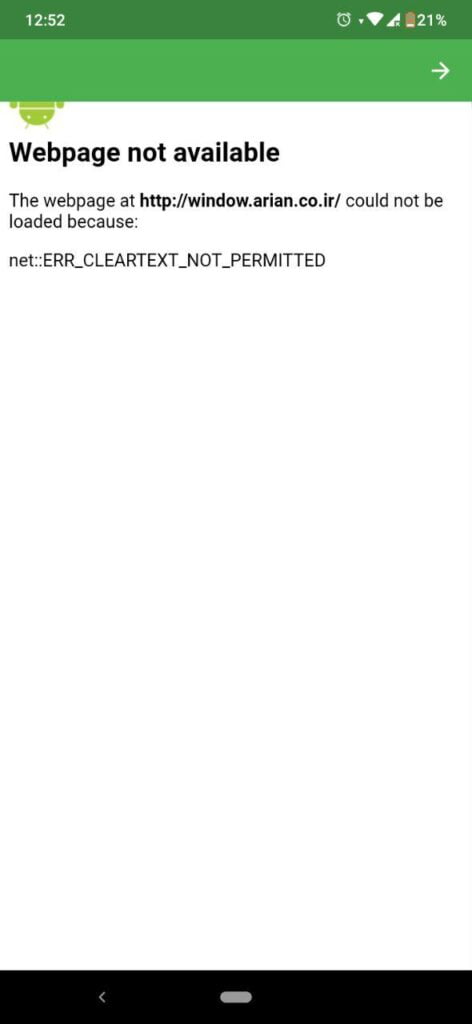
To avoid this error when accessing http websites,
Add this line (underlined one) inside the root element<application>
 <application
  android:label="EXAMPLE"
  android:usesCleartextTraffic="true"
  android:name="${applicationName}"
  android:icon="@mipmap/ic_launcher"
 >
And then the Android mainfest.xml looks like this,
<manifest xmlns:android="http://schemas.android.com/apk/res/android"
    package="com.cypersystems.example">
   <application
        android:label="example"
        android:name="${applicationName}"
        android:usesCleartextTraffic="true"
        android:icon="@mipmap/ic_launcher">
        <activity
            android:name=".MainActivity"
            android:exported="true"
            android:launchMode="singleTop"
            android:theme="@style/LaunchTheme"
            android:configChanges="orientation|keyboardHidden|keyboard|screenSize|smallestScreenSize|locale|layoutDirection|fontScale|screenLayout|density|uiMode"
            android:hardwareAccelerated="true"
            android:windowSoftInputMode="adjustResize">
            <meta-data
              android:name="io.flutter.embedding.android.NormalTheme"
              android:resource="@style/NormalTheme"
              />
            <intent-filter>
                <action android:name="android.intent.action.MAIN"/>
                <category android:name="android.intent.category.LAUNCHER"/>
            </intent-filter>
        </activity>
        <meta-data
            android:name="flutterEmbedding"
            android:value="2" />
    </application>
</manifest>
The same way for ios we will go to the info.plist file and add those lines on the bottom of <dict>
<key>LSApplicationQueriesSchemes</key>
<array>
  <string>https</string>
  <string>http</string>
  <string>sms</string>
  <string>tel</string>
</array>
Now Start with web url:
ElevatedButton (
   Child: Text (‘Launch url in browser’
     style: TextStyle(
        color: Colors.white,
        fontSize: 17,
        fontWeight: FontWeight.w600
     ),
   ),
   onPressed: () async {
     const url ="https://cypersystems.com/";
     if (await canLaunch(url))
     {
     await launch(url);
     }
     else
     {
      throw 'Could not launch $url';
     }
   }
 ),
Make phone call using url launcher:
 ElevatedButton (
   Child: Text (‘Make phone calls/sms’
     style: TextStyle(
        color: Colors.white,
        fontSize: 17,
        fontWeight: FontWeight.w600
     ),
   ),
   onPressed: () async {
     const url ="tel:+1800 0000 0000";
     if (await canLaunch(url))
     {
     await launch(url);
     }
     else
     {
      throw 'Could not launch $url';
     }
   }
 ),
5.Folder by Type:
We write most of our code in the lib folder. It is important to break down lib folder according to category of file. Following are example for breaking down lib folder.
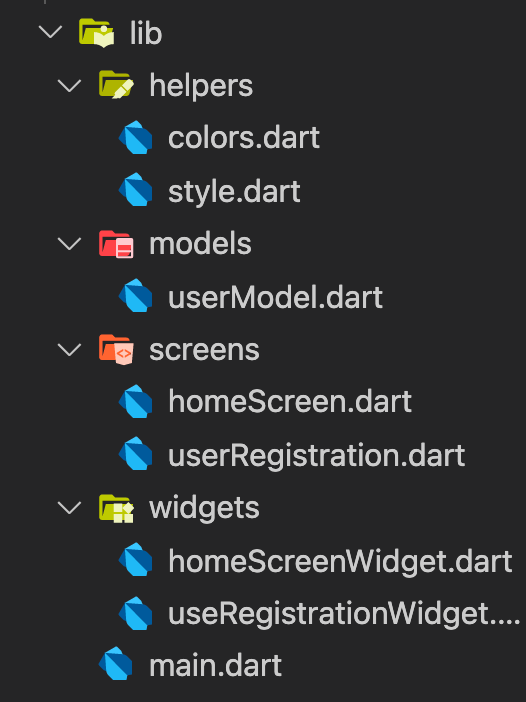
Helpers – Here we can store the themes and styles we used in this folder.
Models – Here we can store all the database models and functions inside model’s folder.
Screens – Here we can store all the screens in our project inside this folder
Widgets – We break down all the complex screens into smaller widgets, here all the widgets can be stored.
Organising the lib folder in this way produces a cleaner structure for your project. This will be extremely useful for debugging and testing. I personally prefer structuring a lib folder like this, you can use your own way to structure it.
6.Rich Text
This will be extremely useful for debugging and testingIf you want to have different styles for your text , use Richtext(). The text to display is described using a tree of TextSpan objects, each of which has an associated style that is used for that subtree.
RichText(
  textAlign: TextAlign.center,
  text: const TextSpan(
    children: [
      TextSpan(
        text: 'This is an example of the',
        style: TextStyle(
        color: Colors.black87,
        fontSize: 17,
        fontWeight: FontWeight.w600
        ),
      ),
      TextSpan(
        text: ' \n Rich Text ',
        style: TextStyle(
        color: Colors.blue,
        fontSize: 17,
        fontWeight: FontWeight.w700
        ),
      ),
      TextSpan(
        text: 'widget ',
        style: TextStyle(
        color: Colors.black87,
        fontSize: 17,
        fontWeight: FontWeight.w600
        ),
      ),
    ]
  ),
),
7.Use SizedBox instead of un-necessary Containers:
If you use a Container only for height or width there might be very minor negligible performance overhead. SizedBox is more lightweight than containers.
8. Status bar color:
You can change the color of your Android app’s status bar using systemOverlayStyle.
void main () {
  SystemChrome.setSystemUIOverlayStyle (
    SystemUiOverlayStyle(
      statusBarColor:Colors.blue,
    ),
  ),
}
9. Navigation bar color:
You can also change the navigation bar color of an android application by using the systemOverlayStyle.
void main () {
  SystemChrome.setSystemUIOverlayStyle(
    SystemUiOverlayStyle(
      systemNavigationBarColor:Colors.blue,
    ),
  ),
}
10. Writing comments:
Writing comments is an important feature in programming. The first and foremost reason is it improves readability. Most of the time when you are doing coding or programming you do it as a team effort or there is someone else working with you. If you write the code only it is not easy to understand to other people what you code does. The second thing is, it’s just for yourself, you can’t remember every single thing you did so without comments you forget why you did certain things and it’s going to be harder for you to debug and fix problems that may come up in future.